Sounds like a silly thing, but we all have to start somewhere. Generally when I dig into something new, I like to start from a place I know well. So when it comes to using a new API, I like to use a tool I know how to use. Kubernetes–and its API is fairly new to me from a hands-on perspective. PowerShell, however, is not. I have decent handle on that. So seems to me a good place to start with the k8s API.
I don’t know if this is the best way, or even a good way, but it does work. And there is also this:
https://www.powershellgallery.com/packages/Microsoft.PowerShell.KubeCtl/0.0.3
But I am trying to learn authentication and the finer points of the API, so I like to start with first principles.
Create a Service Account
So the first step is to create a service account. So create a new file and then in that, enter in the following information, replacing the username and/or namespace with whatever you want:
vim newuseracct.yml
Then apply it:

Again using your favorite editor, create a new file:
vim newuser.yamlThis will apply the cluster admin role to that account. Replace the username, the namespace or even role as needed.
apiVersion: rbac.authorization.k8s.io/v1
kind: ClusterRoleBinding
metadata:
  name: pscody
roleRef:
  apiGroup: rbac.authorization.k8s.io
  kind: ClusterRole
  name: cluster-admin
subjects:
  - kind: ServiceAccount
    name: pscody
    namespace: kube-system
Now apply it:
kubectl apply -f newuser.yaml
Retrieve the Token
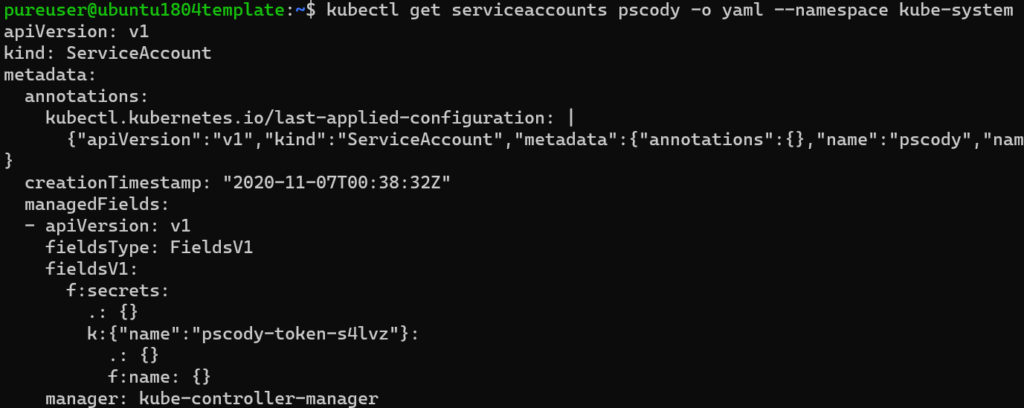
Once the account is created, you need the token. Run:
kubectl get serviceaccounts pscody -o yaml --namespace kube-systemReplacing the username and the namespace as needed.

Under the secrets, grab the name. In my case it is “pscody-token-s4lvz”.
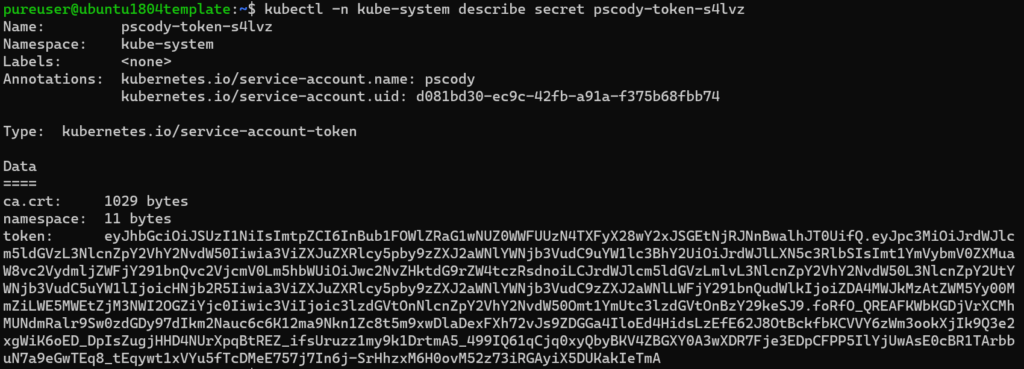
Then run:
kubectl -n kube-system describe secret pscody-token-s4lvz

Copy everything in the token.

Get Server Address
Now you need to get the server address for the cluster where you created the user. So if you don’t know, look at the context via kubectl config get-contexts:

Then, run kubectl config view and pull the server address for the corresponding cluster, so for mine it is cody-dev so the address is https://10.21.202.237:6443

Connect with Invoke-RestMethod
Now head over to PowerShell!
First, store your token in an object, I will use $token.

Then we need to form the header as a bearer token:
$k8sheader = @{authorization="Bearer $($token)"}
This is the format needed to authenticate with that token.
Now you are ready!
To pull the storage classes for instance run:
Invoke-RestMethod -Method GET -Uri https://10.21.202.237:6443/apis/storage.k8s.io/v1/storageclasses -Headers $k8sheader -SkipCertificateCheckYou will need skip certificate check for now–I didn’t configure the certificate checking yet.

If we store the response in an object we can more easily dig in:

And find my default storage class.

Definitely a lot more for me to learn here, but it is a start!

One Reply to “Using PowerShell with Tanzu and the Kubernetes API”