This is the start of a multi-part series (how many parts? I have no idea). But let’s start at the basics–getting TKG deployed on vSphere.
Prepare Environment
So the first step is to download the two OVAs required:
The HA proxy and the photon appliance itself. Download the latest:

Now upload them as a new VM, then mark each as a template:

For each OVA deploy it through the wizard, nothing much required here besides choosing a location. Ideally put it on the same array where you plan to deploy the nodes from it (take advantage of XCOPY or vVol clone if you are running storage that supports that of course).
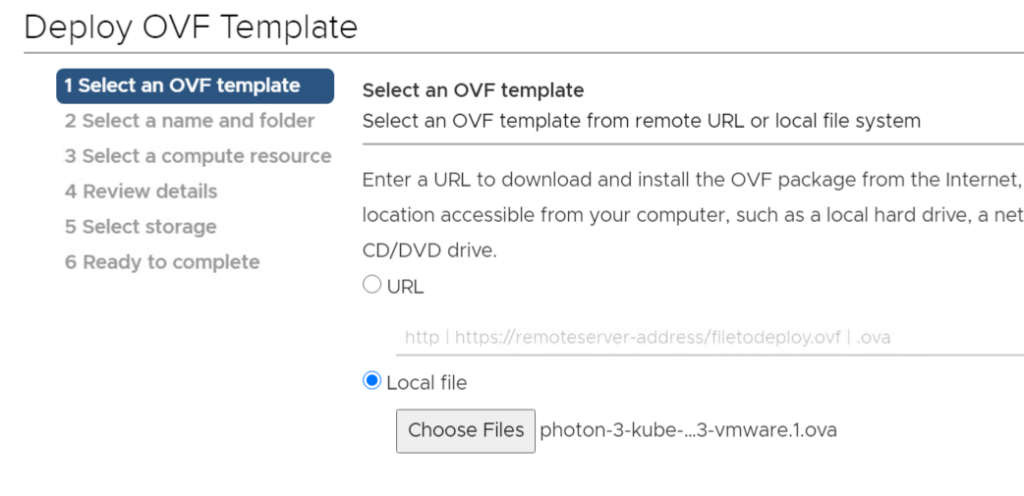

Let the process complete.

Now convert the haproxy VM and kube VM to templates:


I also have a third VM (linux-mgmt), which will be my management VM (Ubuntu server) for running deployment operations.
In that VM, I will create a new SSH key pair for use with connectivity to vCenter:
ssh-keygen -t rsa -b 4096 -C "[email protected]"
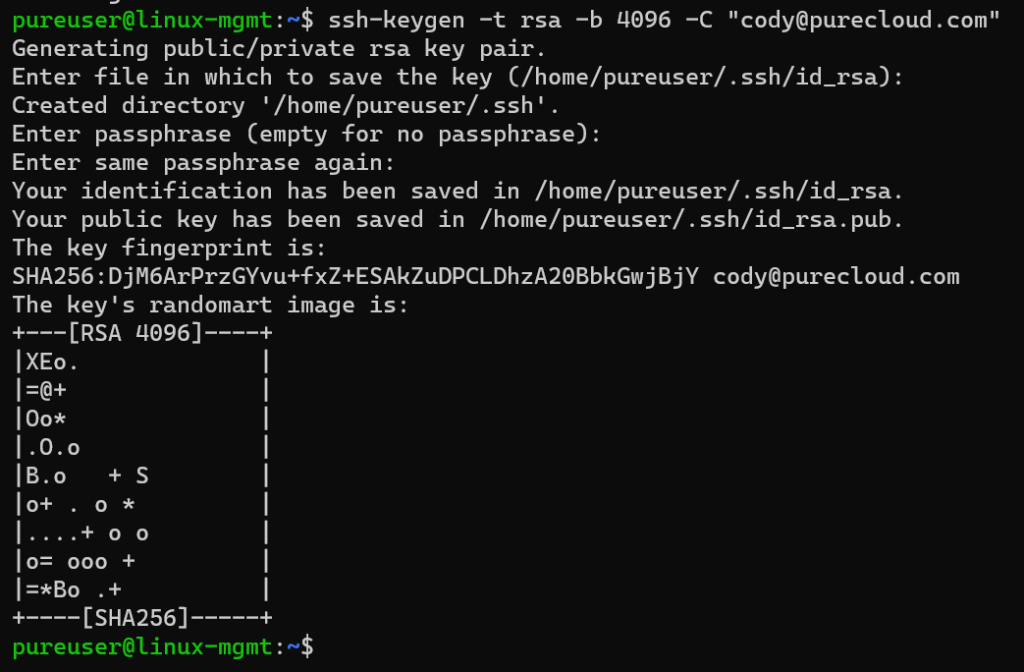
Now add that key to the local SSH agent of your management host. The following works for me on Ubuntu, the direction instructions in the official doc throws an error:
ssh-agent /bin/sh
then
ssh-add ~/.ssh/id_rsa

I plan on deploying from the CLI, so I need to pre-install a few things. First the TKG CLI. Download it from the same place as the OVAs above and copy it to your mgmt host.

Unzip it:
sudo gunzip tkg-linux-amd64-v1.1.2-vmware.1.gz
Then move the file (while renaming it) and then make it executable:
sudo mv ./tkg-linux-amd64-v1.1.2-vmware.1 /usr/local/bin/tkg
sudo chmod +x /usr/local/bin/tkg

Install kubectl
sudo curl -s https://packages.cloud.google.com/apt/doc/apt-key.gpg | sudo apt-key add -
sudo touch /etc/apt/sources.list.d/kubernetes.list
echo "deb http://apt.kubernetes.io/ kubernetes-xenial main" | sudo tee -a /etc/apt/sources.list.d/kubernetes.list
sudo apt-get update
sudo apt-get install -y kubectl
Deploy Tanzu Kubernetes Grid
Time to deploy!
First generate the config yaml file:
tkg get management-cluster

This will create a new hidden folder .tkg:

Now edit the config.yaml file in that folder:

Now I prefer to edit my YAML in VSCode, so I will download the config file and open it there.
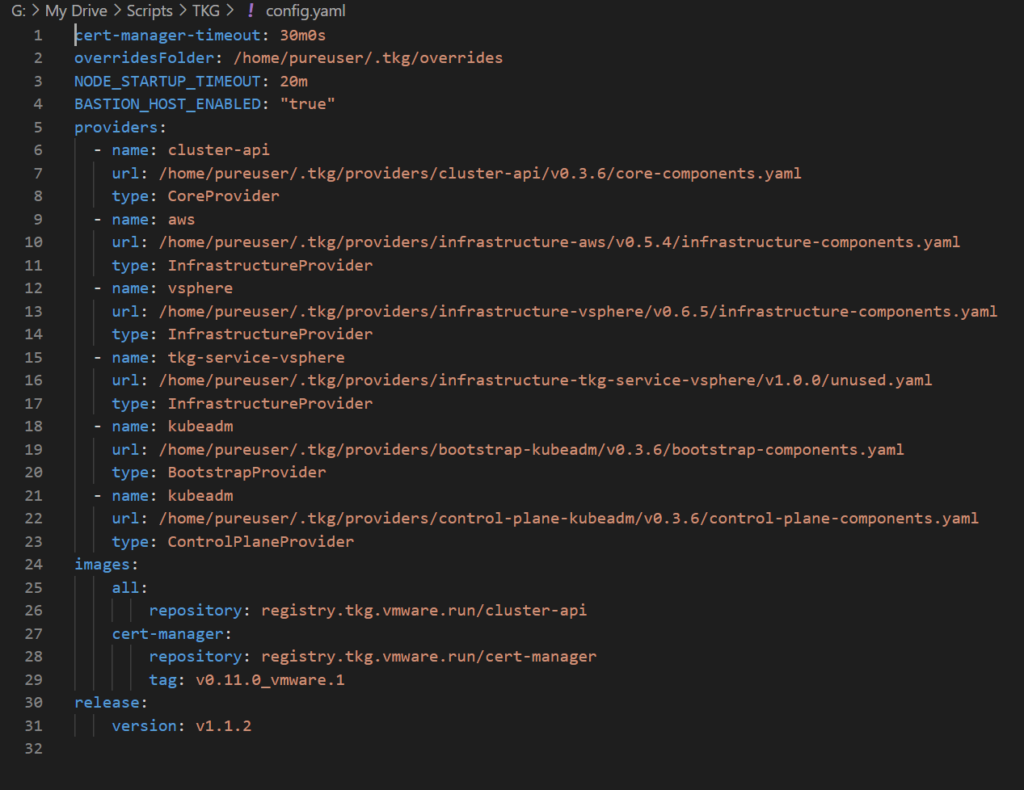
Then I will paste the required new parameters:

So first the vCenter and authentication:

Then the vSphere resources

My datastore:

My datacenter and resource pool:

And my VM folder:

Next your template names:

Then the size of provisioned worker nodes

Then from your mgmt host, grab the public key from the pair you created earlier:

Copy that into the yaml in quotes.

Then go with the defaults for CIDR ranges unless they are unavailable for whatever reason:

So my full YAML with the password redacted:
cert-manager-timeout: 30m0s
overridesFolder: /home/pureuser/.tkg/overrides
NODE_STARTUP_TIMEOUT: 20m
BASTION_HOST_ENABLED: "true"
providers:
  - name: cluster-api
    url: /home/pureuser/.tkg/providers/cluster-api/v0.3.6/core-components.yaml
    type: CoreProvider
  - name: aws
    url: /home/pureuser/.tkg/providers/infrastructure-aws/v0.5.4/infrastructure-components.yaml
    type: InfrastructureProvider
  - name: vsphere
    url: /home/pureuser/.tkg/providers/infrastructure-vsphere/v0.6.5/infrastructure-components.yaml
    type: InfrastructureProvider
  - name: tkg-service-vsphere
    url: /home/pureuser/.tkg/providers/infrastructure-tkg-service-vsphere/v1.0.0/unused.yaml
    type: InfrastructureProvider
  - name: kubeadm
    url: /home/pureuser/.tkg/providers/bootstrap-kubeadm/v0.3.6/bootstrap-components.yaml
    type: BootstrapProvider
  - name: kubeadm
    url: /home/pureuser/.tkg/providers/control-plane-kubeadm/v0.3.6/control-plane-components.yaml
    type: ControlPlaneProvider
images:
    all:
        repository: registry.tkg.vmware.run/cluster-api
    cert-manager:
        repository: registry.tkg.vmware.run/cert-manager
        tag: v0.11.0_vmware.1
VSPHERE_SERVER: vcenter-01.purecloud.com
VSPHERE_USERNAME: [email protected]
VSPHERE_PASSWORD: <REDACTED>
VSPHERE_DATACENTER: SanFrancisco
VSPHERE_DATASTORE: m50-1
VSPHERE_NETWORK: "2202"
VSPHERE_RESOURCE_POOL: TKG
VSPHERE_FOLDER: TKG
VSPHERE_TEMPLATE: photon-3-kube-v1.18.3+vmware.1
VSPHERE_HAPROXY_TEMPLATE: photon-3-haproxy-v1.2.4+vmware.1
VSPHERE_DISK_GIB: "30"
VSPHERE_NUM_CPUS: "2"
VSPHERE_MEM_MIB: "4096"
VSPHERE_SSH_AUTHORIZED_KEY: "ssh-rsa AAAAB3NzaC1yc2EAAAADAQABAAACAQDVeUrG/pNN3QKVgzj3f5HYQ6YzCymv2+YIH5sgDiIrj5mIsVFHLtruhEn509hC6huVE0OhRYvwSdXGKNTc2C1go9L4wDujWrAuVzmAyh/CvbCOrAR+CJsiPnLL06gn7rm4BzWdL4wx7+aDJ+hzmxUVNMUxQn4JQuXM4xoWj91ms4EFyGMnNyQRNJNubQHgzo5s7vpAyXTQ4JtcJb3k/LVOzrm6LWnDP7FlKehvTncKh6d4NSP+nLWG8/D+gzgON6vIBSuGdZL0W+2N1c+2wEKMRT3iPMKKbZpYSPptJ3gUDp/LPruDArMEyJ7OhtqNyB8QflSEWvLpuJCjoUAJGaAF9iE8T0u5P2de1d9yd758hLUJUh/+NHc3UsTjWTe7FrMzorHqR60e6SkRjR/23u+4QRql40Y68ert0JmNLJvHlC/mi1vs7biiqLarTuKKsnAdyXzH09mpfJurJ1eJiToyBaHkTAPQZeOo1bogPyKpDW9ScA3c++L676AfbJCWZ2393txgES+tcUF+9VhLc3NgaQt1BKtVV3sOwOZv4Nty4gp6NfXV+9mLIUL8fQ3xotiqP64hFE6tbdqqic56Fn7JYOmzzC69MkCQ+oDYnYZFMxyq39RbA6YOyC/+DDLEXdPS/XyTYC8JBYDgASRclcsyzQ4HutihaX6eD79zBQAgJw== [email protected] AAAAB3NzaC1yc2EAAAADAQABAAACAQDVeUrG/pNN3QKVgzj3f5HYQ6YzCymv2+YIH5sgDiIrj5mIsVFHLtruhEn509hC6huVE0OhRYvwSdXGKNTc2C1go9L4wDujWrAuVzmAyh/CvbCOrAR+CJsiPnLL06gn7rm4BzWdL4wx7+aDJ+hzmxUVNMUxQn4JQuXM4xoWj91ms4EFyGMnNyQRNJNubQHgzo5s7vpAyXTQ4JtcJb3k/LVOzrm6LWnDP7FlKehvTncKh6d4NSP+nLWG8/D+gzgON6vIBSuGdZL0W+2N1c+2wEKMRT3iPMKKbZpYSPptJ3gUDp/LPruDArMEyJ7OhtqNyB8QflSEWvLpuJCjoUAJGaAF9iE8T0u5P2de1d9yd758hLUJUh/+NHc3UsTjWTe7FrMzorHqR60e6SkRjR/23u+4QRql40Y68ert0JmNLJvHlC/mi1vs7biiqLarTuKKsnAdyXzH09mpfJurJ1eJiToyBaHkTAPQZeOo1bogPyKpDW9ScA3c++L676AfbJCWZ2393txgES+tcUF+9VhLc3NgaQt1BKtVV3sOwOZv4Nty4gp6NfXV+9mLIUL8fQ3xotiqP64hFE6tbdqqic56Fn7JYOmzzC69MkCQ+oDYnYZFMxyq39RbA6YOyC/+DDLEXdPS/XyTYC8JBYDgASRclcsyzQ4HutihaX6eD79zBQAgJw== [email protected]"
SERVICE_CIDR: 100.64.0.0/13
CLUSTER_CIDR: 100.96.0.0/11
release:
    version: v1.1.2
I will then upload that back to my mgmt host.

Now kick off the deploy
sudo tkg init --infrastructure=vsphere --name=cody-tkg-vvol --plan=prod --config ./config.yaml

If you are on Ubuntu, makes sure you run it with sudo, otherwise you get cryptic errors like “the docker service is not started”. Also make sure you don’t use uppercase if you choose a custom cluster name–it will fail the regex checks.

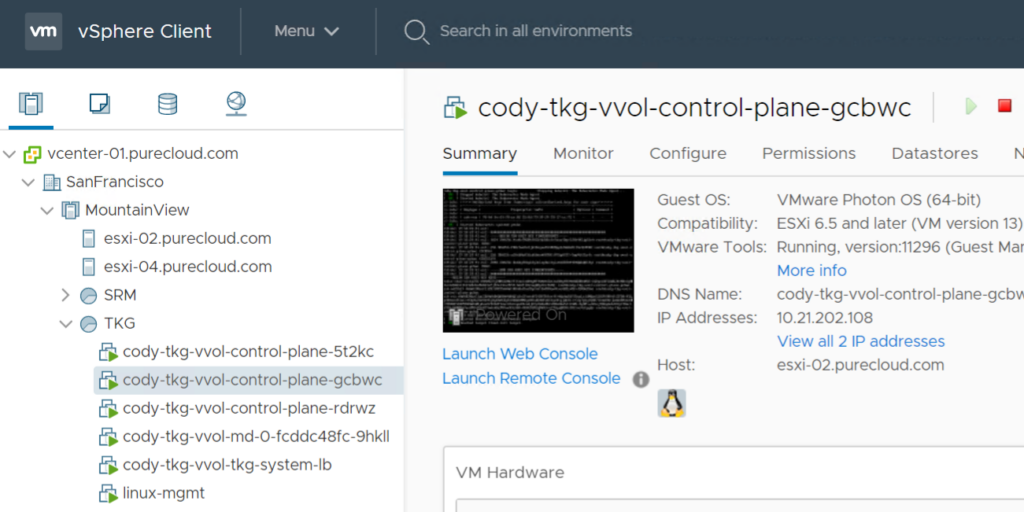
You will start to see the VMs appear:

And done!
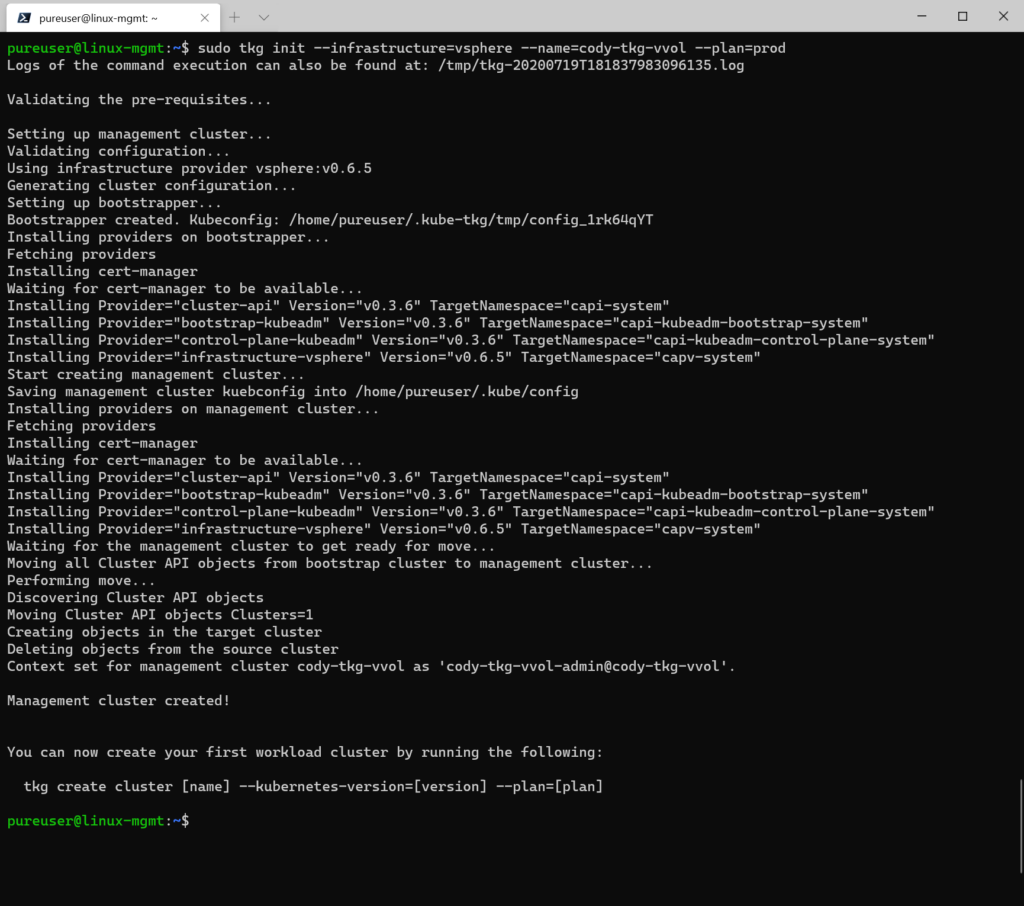
Management cluster is done!
In the next post we will configure the VMware CSI driver (Cloud Native Storage).

Hi Cody, quick query. is it supported by VMware to use VVOL datastore as Cloud Native Storage (CNS) for TKG deployments running on vSphere 6.7 U3?
Yes it is! This series will be about it deploying together
Thanks for the response Cody. I was a bit confused because this VMware blog https://blogs.vmware.com/virtualblocks/2020/06/17/using-vvols-with-cns/ says “With vSphere 7.0 and the CSI 2.0 driver for vSphere we have introduced a much sought-after feature: support for vVols as a storage mechanism for Cloud Native Storage”.
So i chatted with VMware PM on this. So it should just work, it was just not “qualified” for 6.7. I am pressing on them to do so as 6.7 will still be around for some time. Stay tuned
Hello Cody. First thaks for this tutorial, please i need help, i have done all th steps of your tutorial but i hav e a problem with the cert-manager.
My deployment stuck due cert manager error. I post my result
Setting up management cluster…
Validating configuration…
Using infrastructure provider vsphere:v0.6.5
Generating cluster configuration…
Setting up bootstrapper…
Bootstrapper created. Kubeconfig: /root/.kube-tkg/tmp/config_PxoLoR5j
Installing providers on bootstrapper…
Fetching providers
Installing cert-manager
Waiting for cert-manager to be available… (here is the problem please help me because i dont find info)
Hello Daniel- this is not an error I’m familiar with. I wonder if this KB shows the same issue you have in logging?
https://kb.vmware.com/s/article/82334