So over the past two years or so I have been talking up vRealize Orchestrator quite a bit. And a fair amount of that conversation was based on the eventual usage of vRealize Automation. While I certainly feel vRA is a GREAT use case for vRO, the usefulness of vRO does not in any way require vRA.
A common question I get is, “hey can you add this feature to the official FlashArray Plugin?”. The answer is often “maybe” or “eventually” but sometimes even “no”. The plugin is centered at the satisfying the majority and therefore sometimes does not exactly meet your requirements.
So with these two things in mind, what is the connection? Well, using vRO (which is FREE when you have vCenter) you can easily build your own. Especially when you install the FlashArray vRO plugin.
I see a couple advantages here:
- Start learning vRO. Using default workflows so you don’t have to “code” anything. Then start with some more customization as you become familiar.
- Provide tailored workflows in the vSphere Web Client
- Interface-agnostic workflows. As you move forward and use the HTML-5 interface, or vRA you don’t have to redo your work.
Registering vRO with vCenter
So the first step is registering your vRO instance with vCenter. This can be tricky. It includes a few steps:
- Adding vCenter to vRO
- Registering vRO as a vCenter extension
- Rebooting vRO
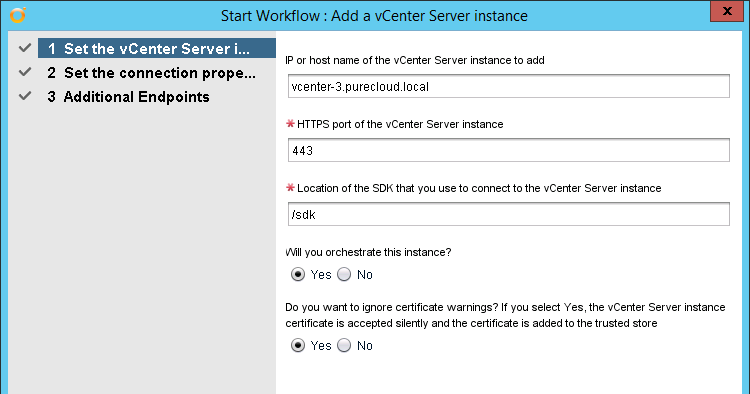
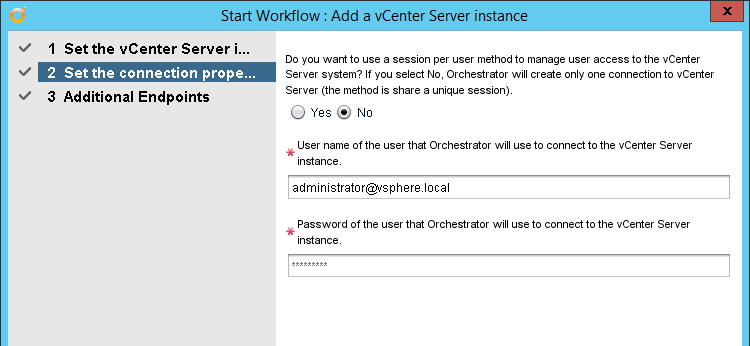
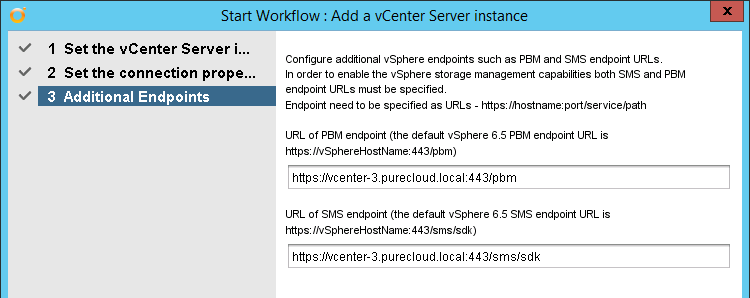
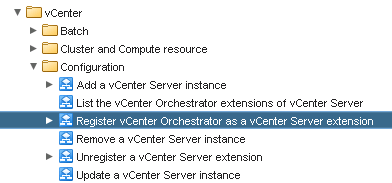
So, let’s walk through this. First, vRO needs to have vCenter added to it. This is done with the “Add a vCenter Server instance” workflow in vRO.
Run this and add your vCenter. Generally this part is pretty straight forward. Use the FQDN and give it administrative credentials.
Once that finishes, now you need to actually register the vRO instance as an extension. This is also done in vRO, using the workflow called “Register vCenter Orchestrator as a vCenter extension”.
This part is what causes some issues for people. So first, run the workflow:
There is only one screen. It asks for the vCenter. So choose your vCenter. Also it OPTIONALLY asks for an address. This address is what vCenter will use to download the plugin info from and it has to be in the form of https://<vro address>:8281. Or another port if you changed it for some reason.
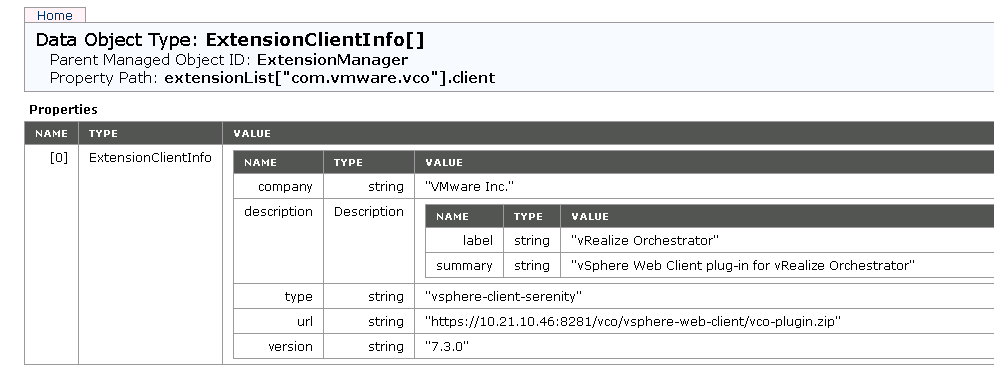
So. Do you need to enter this? Not always. vRO will default to using the IP of the vRO instance. You can confirm this by using the Managed Object Browser of your vCenter.
Generally, I recommend doing this. If the vCenter can not resolve or contact the default address this integration will not work. I ran into this in the situation where my vRO had a IPv6 and IPv4 address and vRO defaulted to the IPv6 address which my vCenter could not resolve. So I would just enter in something you know works to save yourself a headache.
Once it has installed you have to reboot your vCenter! This is a step that is easy to miss, and is required so do this when convenient.
Adding Workflows to vCenter Menu Options
Note: There is also a great blog post I found on this published recently here:
https://www.viktorious.nl/2017/05/19/add-vro-workflows-to-the-context-menu-in-vcenter-server/
Found that post just after publishing this one! Would have saved me some writing.
Once rebooted, log into your vCenter and from the home screen, click on the vRealize Orchestrator icon.
You should see your vRO server listed. If not, look at the virgo (vSphere Client) logs of the vCenter to see why it doesn’t appear.
Windows: %ALLUSERSPROFILE%\VMWare\vCenterServer\logs
VCSA: /var/log/vmware/
Another reason besides what I mentioned earlier (un-resolvable address) is the vRO instance uses a different vCenter for authentication. The Web Client uses the logged in user to identify access to vRO servers, if the vRO server authenticates with a different vCenter the vRO will fail to appear. You will see something like this in the error log:
Error creating vCO service on [Configuration [servicePath=/vco/api/, vcoServiceUri=https://10.21.10.47:8281, serviceGuid=10.21.10.47]] org.springframework.web.client.HttpServerErrorException: 503
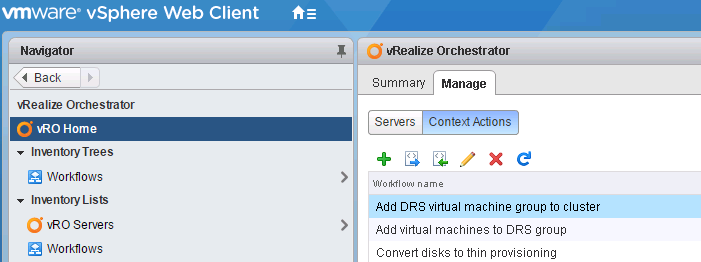
Click on the vRO Home button and then the “Context Actions” tab in the pane that appears.
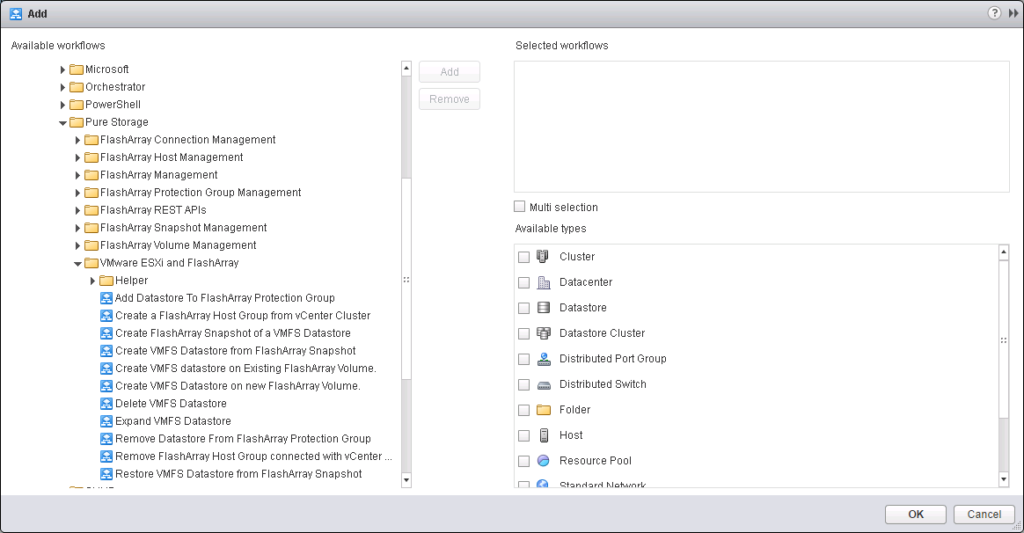
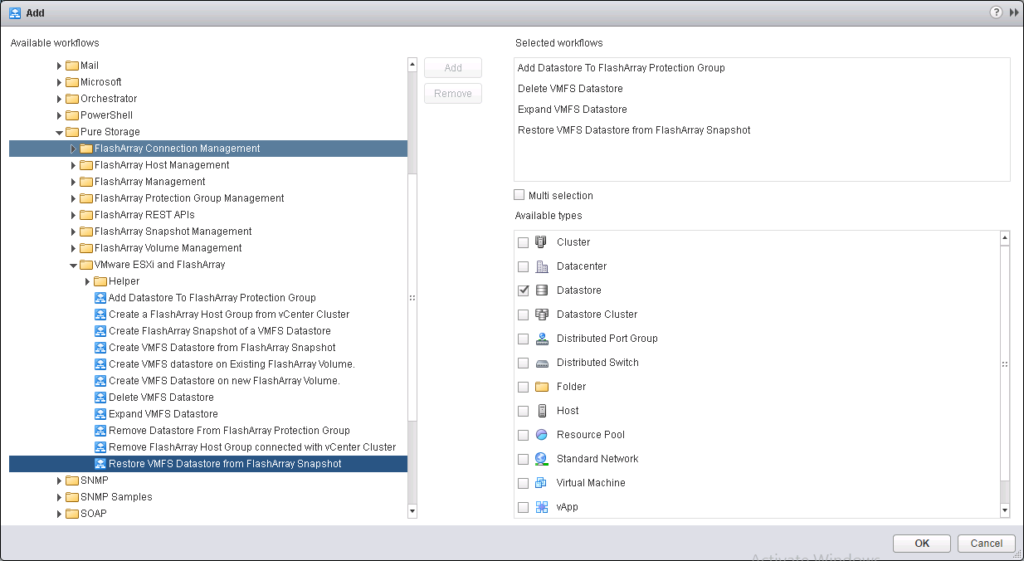
This is where you can associate a vRO workflow with an inventory type. Here you can choose a workflow to add to the right-click menu of your inventory item. You can use the various built-in vRO workflows or, for instance, one of the ones built into the FlashArray vRO plugin:
The VMware-centric FlashArray vRO default workflows are listed above (there will be a lot more added soon).
Choose a workflow or workflows. In this case, I will choose “Expand VMFS Datastore”, “Delete VMFS datastore”, ” Restore VMFS datastore from FlashArray Snapshot”, and “Add Datastore to FlashArray Protection Group”.. I will then choose the object I want them to be available from. Which in this case is a datastore object.
Then click OK and log out and then back into the vSphere Client.
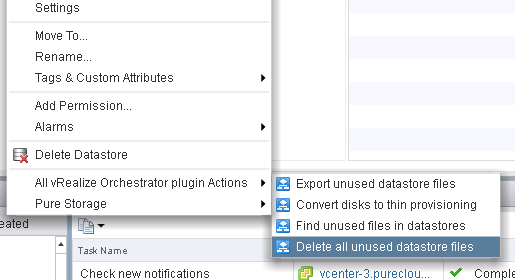
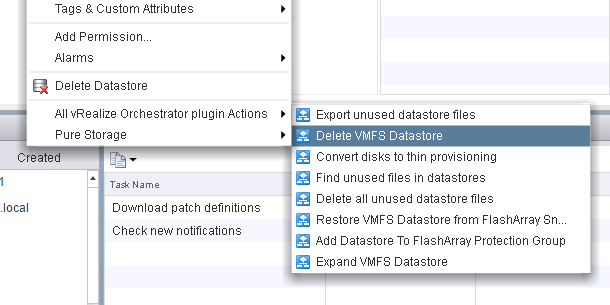
When you right-click on a datastore now, your “All vRealize Orchestrator plugin Actions” menu changes from:
Running a Workflow from vCenter
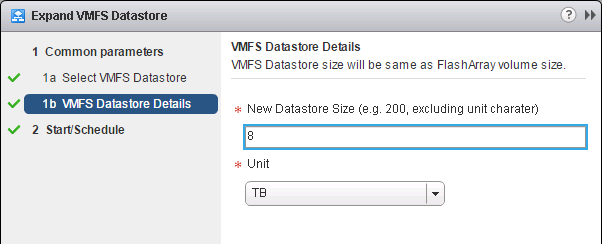
Now I can run these workflows from these objects! So let’s right-click on a datastore and run the expand workflow:
The first window shows the datastore to choose, which is automatically entered by clicking on that datastore:
Next, the new size. It is now 4 TB, but I will make it 8 TB:
Click Finish. If there is an error it will appear in your “Recent Tasks”:
If I fix it, I will see it run and the operations it executed in my “Recent Tasks”:
A lot more on this topic to come. Including access control and more. Stay tuned.
